Parts & tools
What comes in the Starlink box, and what you still need to mount it
The box gets you online on the lawn. Getting it onto a roof, a wall or a pole takes a mount and a few more parts. Here’s the full list for your spot.
$100First Starlink? The pre-order checklist and our referral linkStarlink comes with a kickstand, not a roof or wall mount: the box has the dish, a kickstand, the router, a 15 m (49.2 ft) cable and the power parts (the V5 adds a pipe adapter).
If your yard scans clear, that’s everything. For a roof, wall or pole you add the mount made for that surface and your dish, a way to get the cable inside, and a few tools. The table below lists them by spot.
What’s in the Starlink box
Starlink’s US home order list carried three dishes on Nov 3, 2026: Standard 4 X (Starlink also calls it “V4”), Standard 4 and Starlink V5. Starlink says the V5 is in select areas for now. Here’s each box, as Starlink lists it:
Standard 4 X
- Starlink dish
- Kickstand
- Router 3
- Starlink Cable, 15 m (49.2 ft)
- AC Power Cable, 1.5 m (4.92 ft)
- Power Supply Unit, 1.5 m (4.92 ft)
Standard 4
- Starlink (with kickstand)
- Dual PoE power supply
- Router Mini
- Router Mini stand
- Starlink cable, 15 m (49.2 ft)
- Starlink Ethernet cable, 2 m (6.57 ft), water-sealed on the power-supply end
- AC power cable, 1.5 m (4.92 ft)
Starlink V5
- Starlink
- Kickstand
- Router Mini with Stand
- Pipe Adapter
- Starlink Cable 15 m (49.2 ft)
- AC Cable 1.5 m (4.92 ft)
- Ethernet Cable 2 m (6.56 ft)
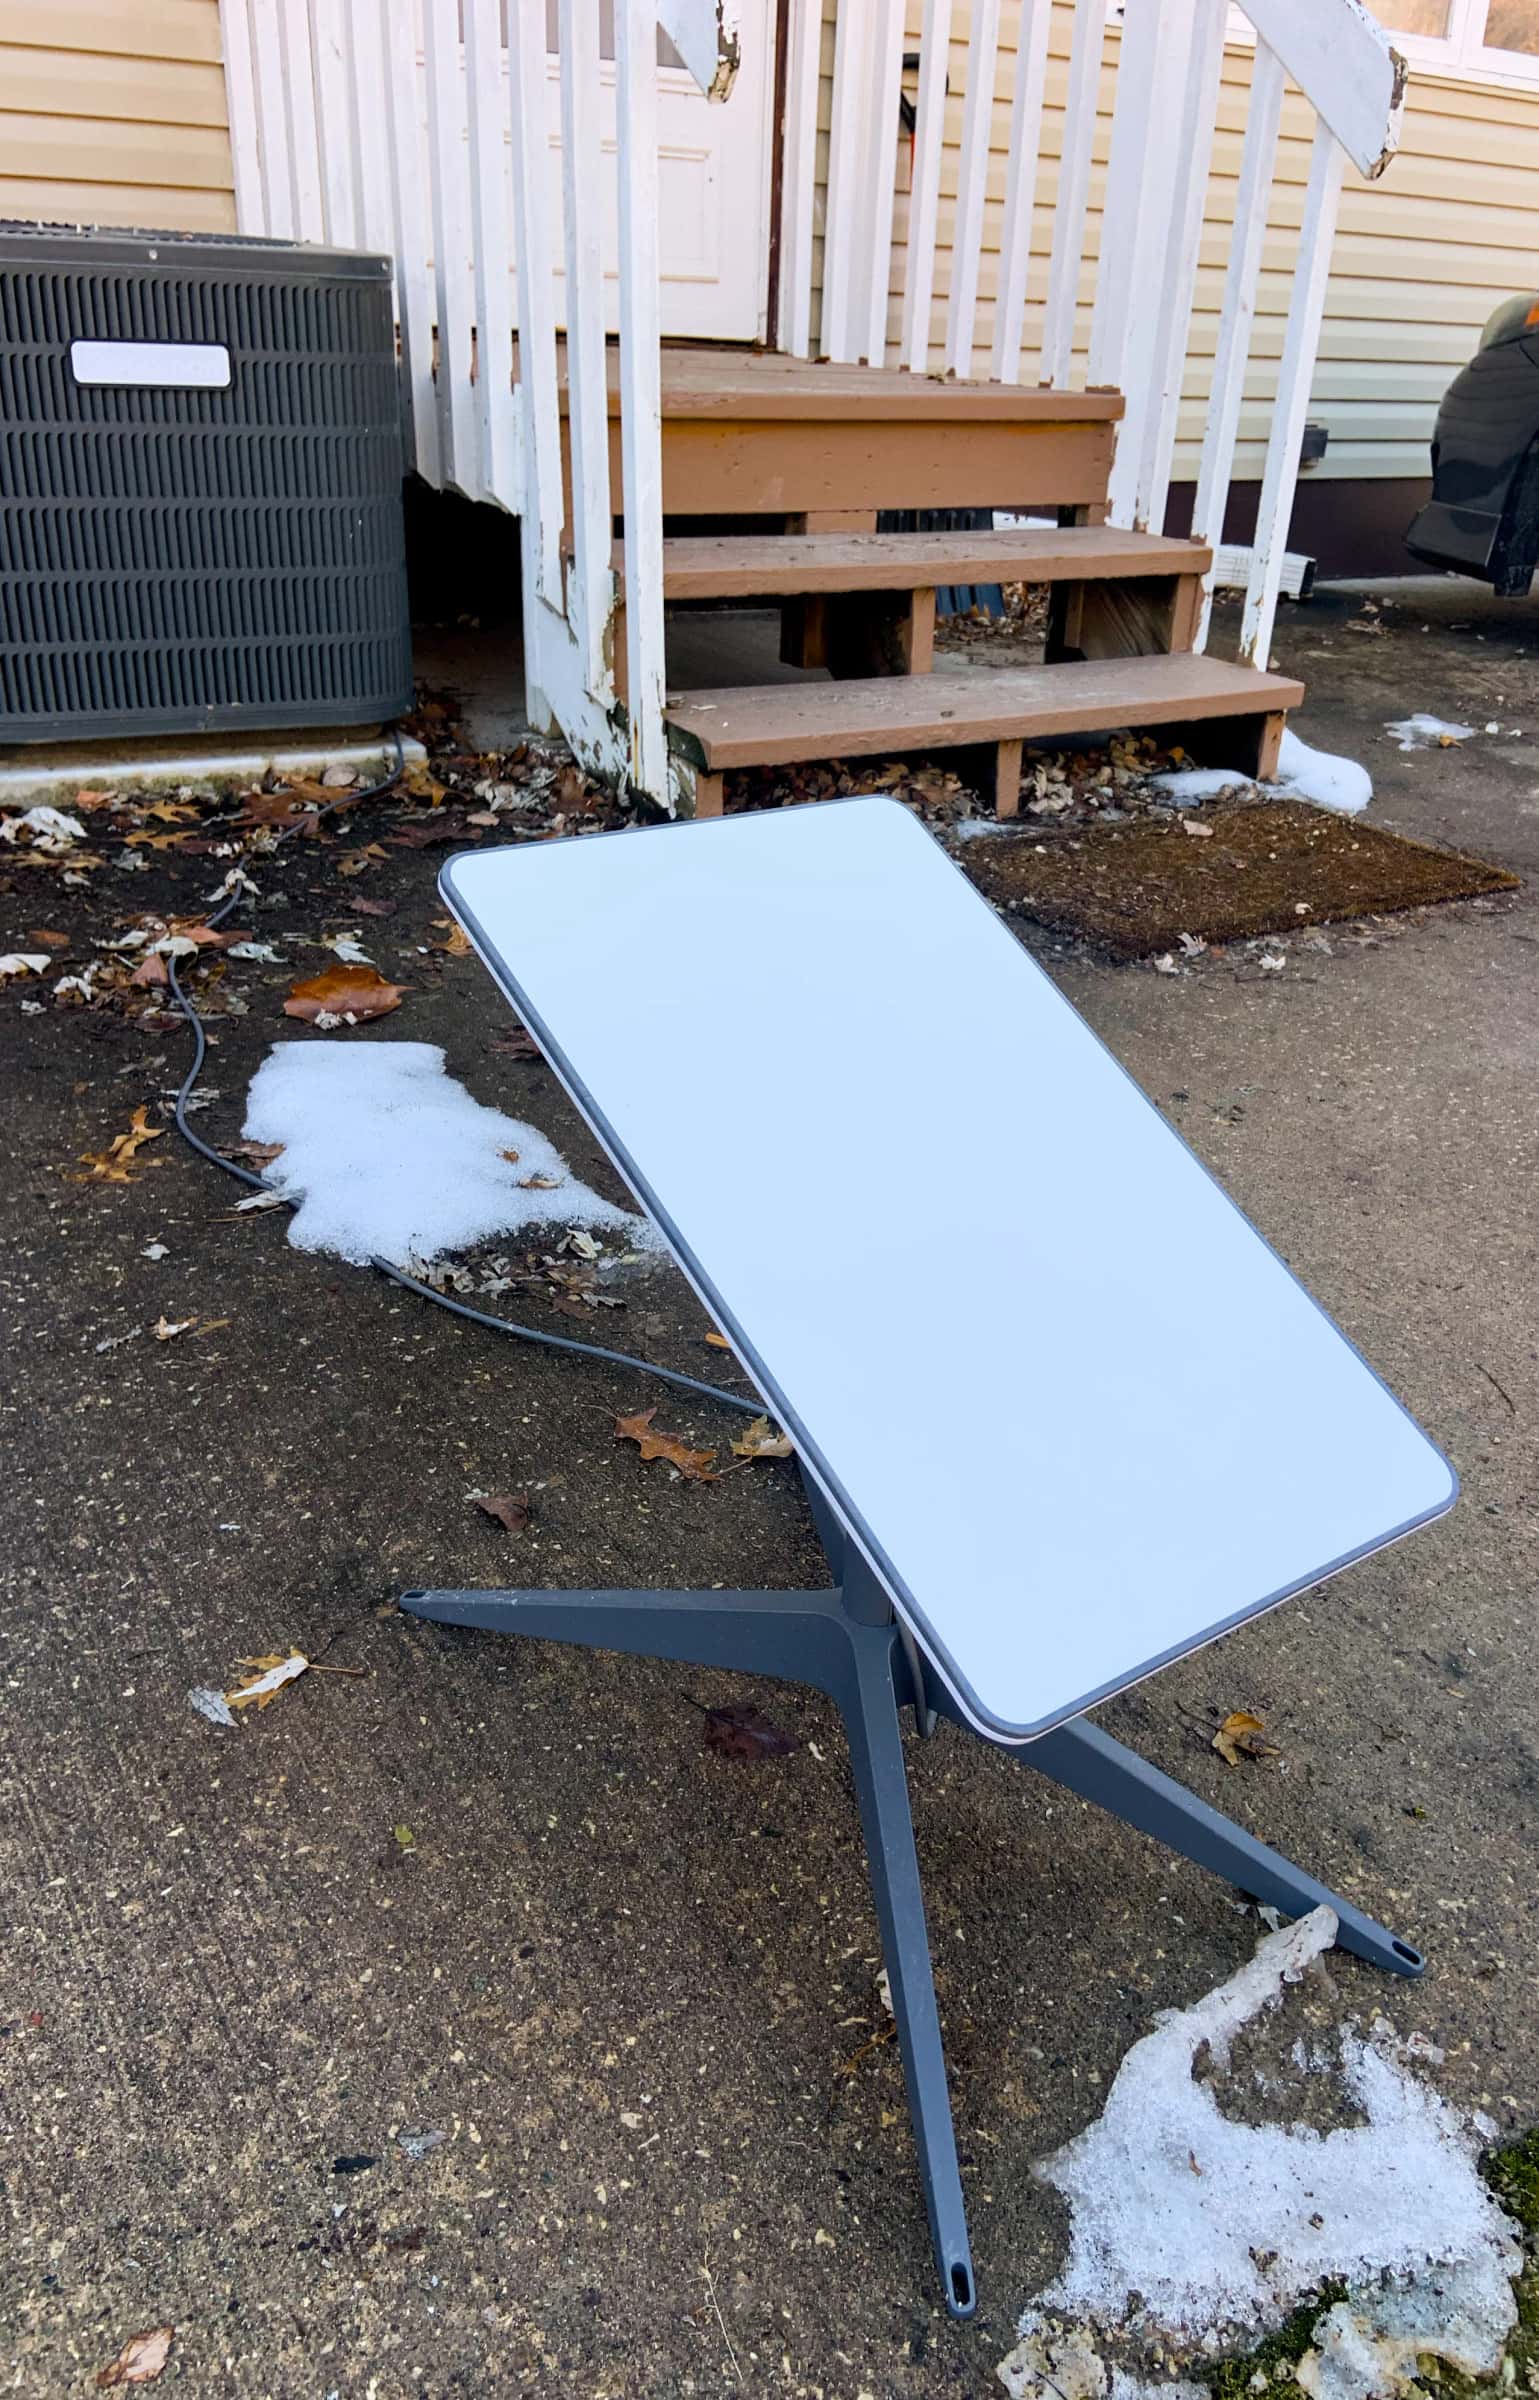
Does Starlink come with a mount?
Only a stand. Starlink’s list of mounts in the box: V5, a kickstand and a pipe adapter; Standard 4 X (V4), a kickstand. Starlink’s support pages say the Standard kit’s kickstand can be used for a quick setup or a permanent install. Its accessories article adds that the stand in the box is meant for ground level or a quick test, and that its mounts and cable-routing accessories are for permanent installs up high, on a roof, pole or wall.
So the short answer: if the dish can live on the ground, you’re done. If it has to go up, budget for a mount.
When to buy the mount
Starlink says its mounts are sold on its shop once your kit is ready to ship, and that its Standard mounts fit only Standard and Enterprise dishes. Waiting until then means you know whether a Standard 4 X, a Standard 4 or a V5 is coming, and you buy the mount that fits it.
Bought the wrong one?
Starlink says accessories from its shop, including mounts, can be sent back for a full refund up to 30 days after delivery.
Build your parts list in 7 steps
Step 1: Find the spot first
Where the dish goes decides every part you buy. Start with our fit check, then scan the real spot with a sky scan in the Starlink app, which Starlink’s install guides say to use before mounting.
Step 2: Note what the spot is made of
Lawn, shingles, metal panels, clay tile, a flat membrane roof, vinyl siding, brick or stucco. Each one changes the mount, the fasteners and the cable kit.
Step 3: Wait until you know which dish is coming
Starlink’s Standard mounts fit only Standard (4 and 4 X) and Enterprise dishes; the V5 has its own. Starlink sells mounts on its shop once your kit is ready to ship, so buy then.
Step 4: Pick the mount from the table below
One mount per spot. If the yard scans clear, the stand in the box may be all you need.
Step 5: Measure the cable route
Measure from the dish, along walls and down to where the cable enters, then inside to the router’s outlet. Every current kit includes a 15 m (49.2 ft) cable.
Step 6: Choose how the cable gets inside
A routing kit for drilled walls, the masonry kit for brick or stucco, or a door or window entry. Cable options.
Step 7: Gather the tools and safety gear
Use the checklist further down. For any roof work, the harness and a helper are not optional.
Parts by spot
Starlink prices are what its shop listed on Nov 3, 2026, shipping included. Everything else comes from a hardware store and varies.
| Spot | Starlink part | Also buy | Guide |
|---|---|---|---|
| Ground | Kickstand (in the box), or X-Frame Base $75 (Standard 4 / 4 X) | Pavers, sandbags; conduit to cross the lawn | Ground |
| Shingle roof | Pivot Mount $60 (Standard 4 / 4 X) · Home Mount $40 (V5) | Roofing sealant, cable clips, harness and roof anchor | Roof |
| Metal roof | Ridgeline Mount $250, or the pipe adapter on a seam-clamp mast | Seam clamps for your profile, seam cable clips | Metal roof |
| Gable roof, no holes | Ridgeline Mount $250 (Standard 4 / 4 X) | A tether, rope and bucket to haul the ballast | No-drill |
| Wall or eave | Wall Mount $67 (Standard 4 / 4 X) · Home Mount $40 (V5) | Exterior sealant; masonry anchors for brick | Wall |
| Pole | Pipe Adapter $38 (1.25–2.5 in pipe) · V5: adapter in the box (1.2–2.0 in) | Metal pipe, concrete, gravel, conduit, guy kit for tall poles | Pole |
| Every spot | Cable Routing Kit $32 or Masonry Routing Kit $46 | Outdoor cable clips | Cable |
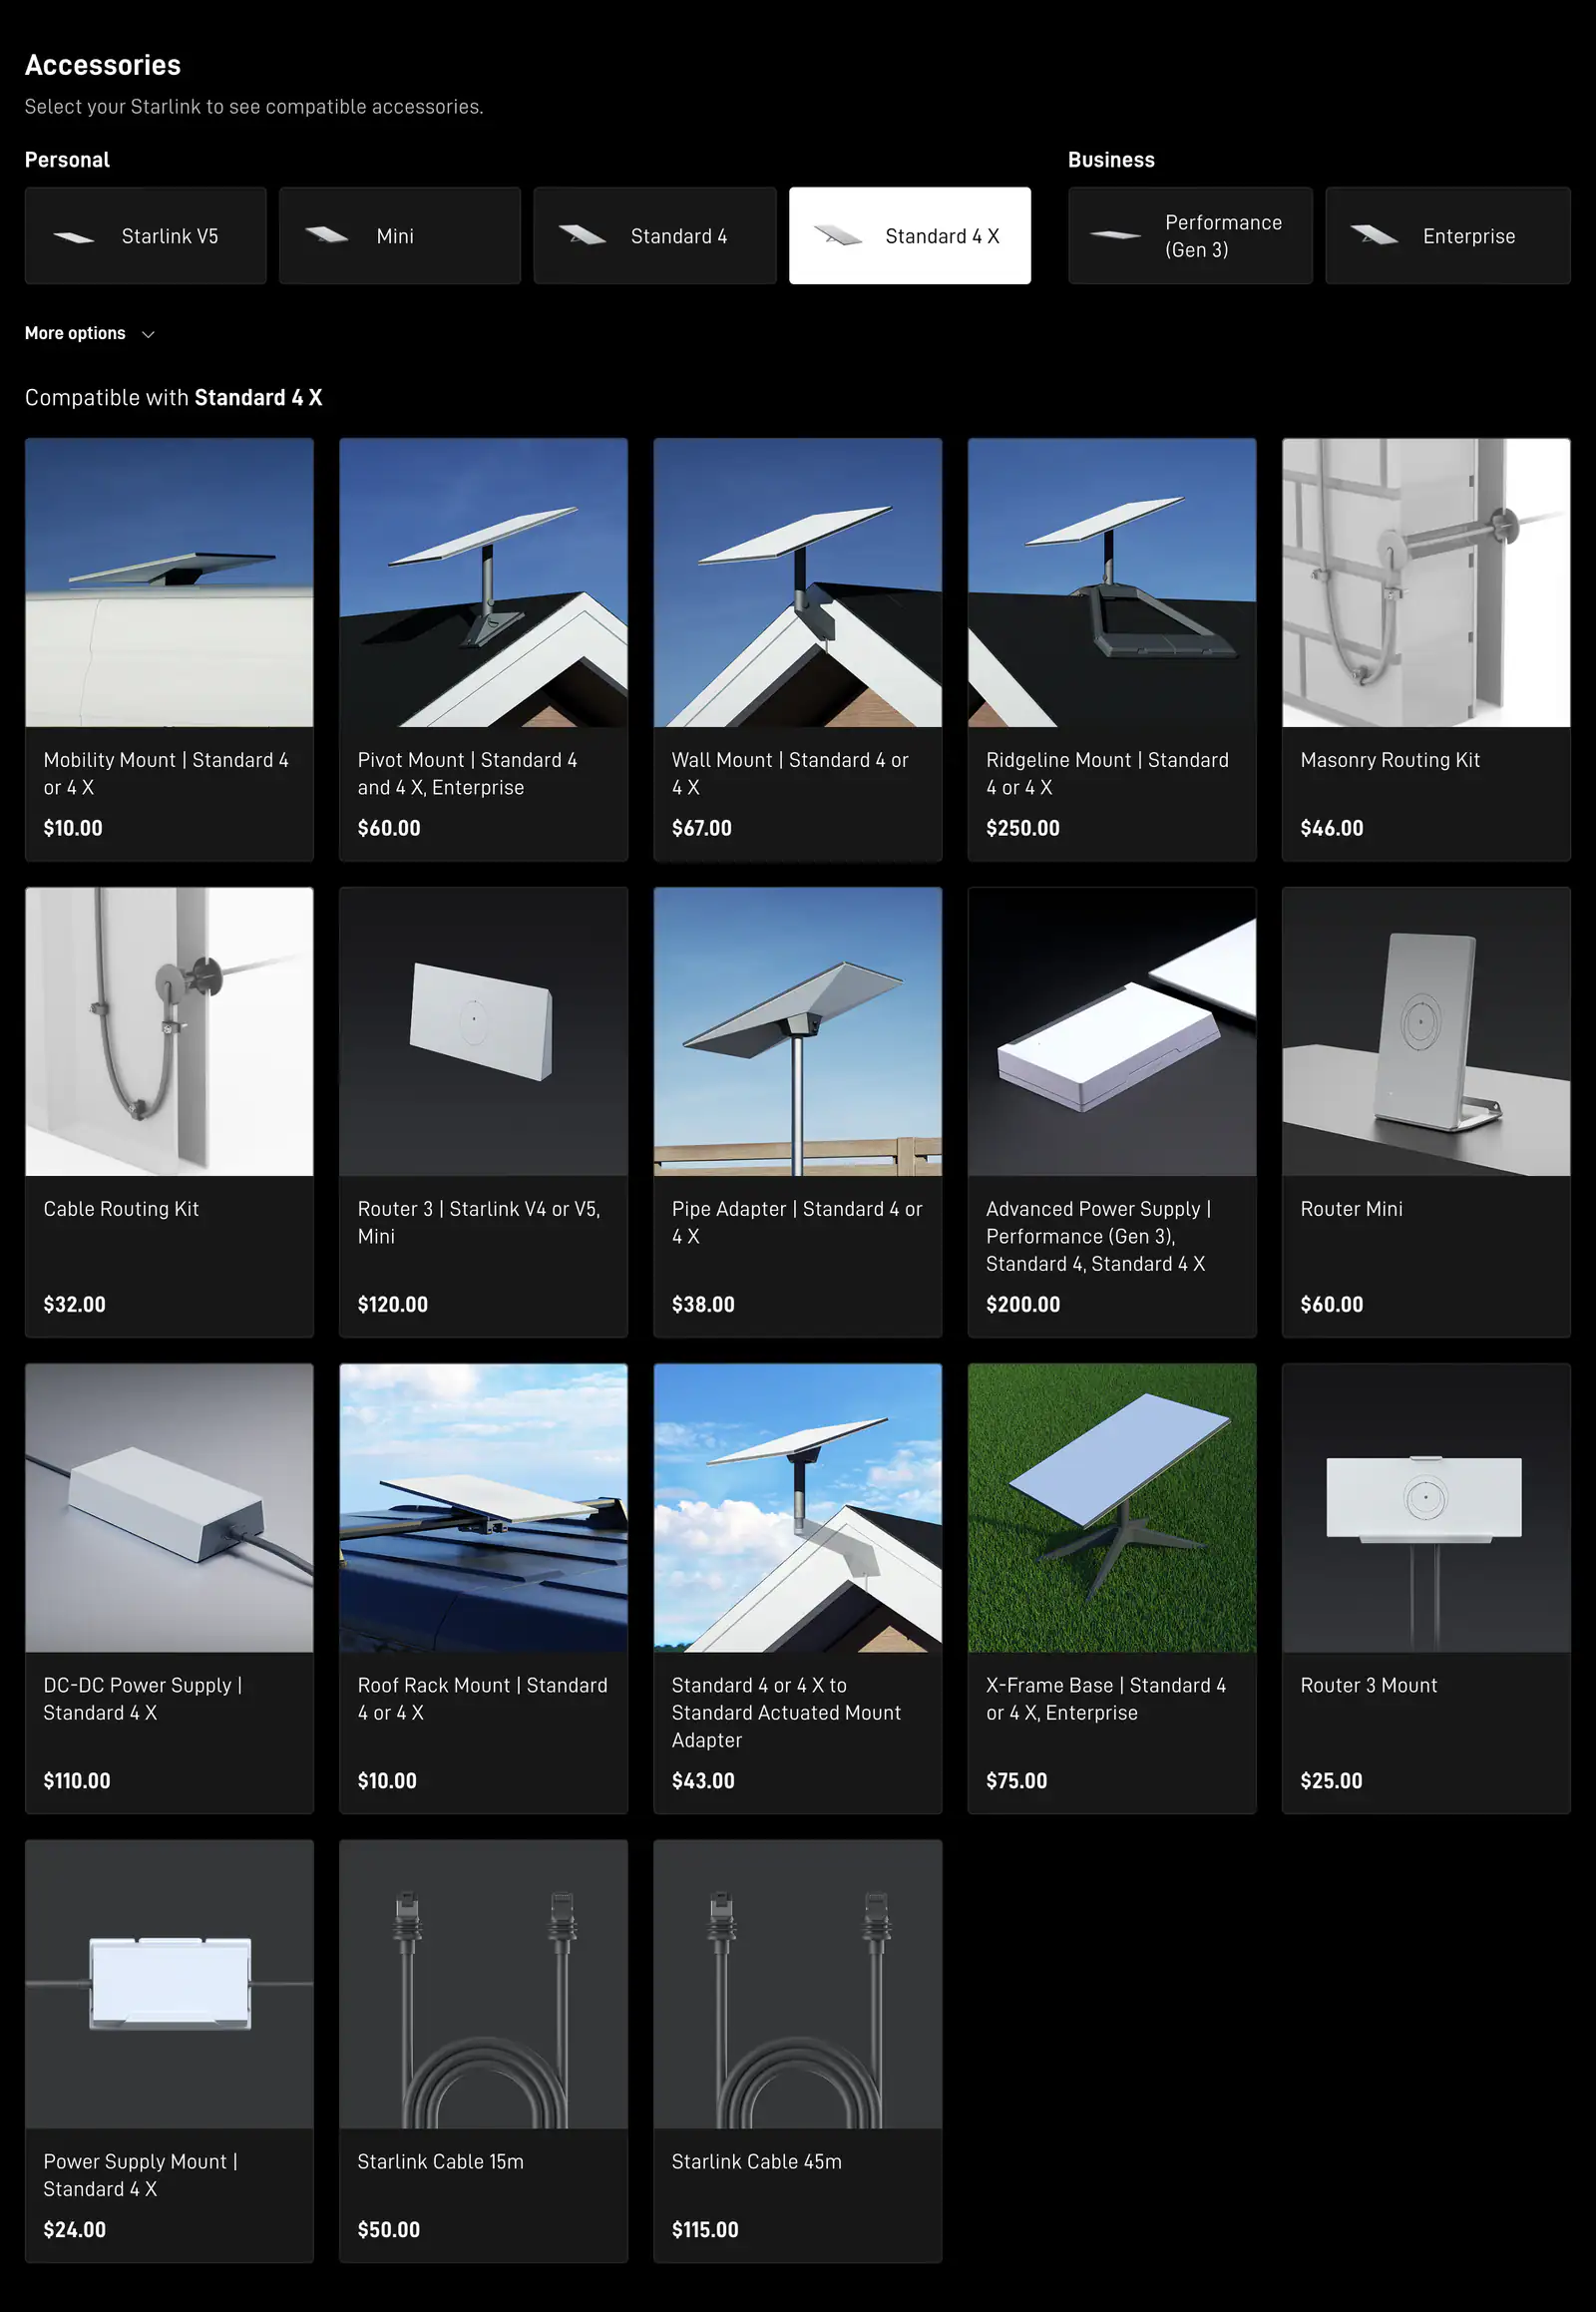
Indoors, two small extras are worth a look for the Standard 4 X: Starlink sells a Router 3 wall mount ($25) and a Power Supply Mount ($24). Starlink says to put the power supply where it can cool, because it shuts off, and drops the connection, if it overheats.
Is the Starlink cable long enough?
Every current kit comes with a 15 m (49.2 ft) Starlink cable. That reaches a roof or wall spot on most houses. It can fall short for a pole out in the yard, or a two-story run that has to go around the house first.
- Measure the real route with string: up or down the mast, along the wall, through the entry hole, and inside to the router outlet. Add a few feet for drip loops.
- Too short? Starlink sells a 45 m (147 ft) cable for $115.
- Don’t splice it. Starlink advises against cutting, joining or extending its cable, and its specifications say to connect the dish directly, without jumper cables.
- Don’t bury it bare. Starlink says the cable isn’t rated to be buried or to sit in water. Our rule of thumb: sealed outdoor-rated conduit that can’t fill with water.
Tools checklist
Starlink lists the tools for its Wall Mount as: drill, stud/electrical finder, socket wrench, level, 1/4-inch (6 mm) bit, 9/16-inch socket, pencil. That set covers most mounts. Add what your spot needs:
Every install
- Phone with the Starlink app
- Drill and bits, socket wrench
- Stud / electrical finder, level, pencil
- Exterior sealant, cable clips
- Tape measure
Roof
- Extension ladder (3 ft past the edge)
- Harness, rope and roof anchor
- Roofing sealant, chalk line
- A helper
Pole
- A call to 811 first
- Post-hole digger or auger
- Concrete, gravel, braces
- Conduit for the cable run
Brick or stucco
- Hammer drill and masonry bit
- Outdoor masonry anchors
- Masonry Routing Kit for the cable
For grommets, bolts and other small parts, Starlink suggests a local hardware store.
Rather not deal with parts at all? Where Starlink offers professional installation, it says a standard home mount is included, along with the placement and a basic sealed penetration. DIY parts vs a pro install: what each costs.
Don’t order yet if…
- you haven’t found a spot that scans clear, so you don’t know which mount you’d need
- the only spot that works needs parts or work you can’t do safely, and there’s no installer near you
- the cable route from the only clear spot is longer than the longest Starlink cable
Questions this page answers
Does Starlink come with a mount?
Only a stand. Starlink lists what’s in the box by dish: the V5 has a kickstand and a pipe adapter; the Standard 4 X (V4) has a kickstand. Starlink says the stand that comes with some kits is for ground level or a quick test, and its roof, pole and wall mounts are for permanent elevated installs.
What’s in the Starlink box?
The Standard 4 X box has the dish, a kickstand, Router 3, a 15 m (49.2 ft) Starlink cable, an AC cable and the power supply. The Standard 4 and V5 boxes swap in a Router Mini and add an Ethernet cable; the V5 also has a pipe adapter.
Is the Starlink cable long enough?
Every current kit has a 15 m (49.2 ft) cable. Measure your route before you pick the spot. Starlink sells a 45 m (147 ft) cable ($115 on its shop) and advises against cutting, splicing or adding extra cables.
What tools do I need to install Starlink?
For a ground setup, none. For a wall mount, Starlink lists: drill, stud/electrical finder, socket wrench, level, 1/4-inch (6 mm) bit, 9/16-inch socket, pencil. Roof and pole installs add a ladder, a harness and roof anchor, sealant, or a post-hole digger and concrete.
Can I buy a Starlink mount before my kit arrives?
Starlink says its mounts are available on its shop once your kit is ready to ship. Waiting also tells you which dish you’re getting, so you don’t buy a mount that doesn’t fit.
Where do I get bolts, anchors and grommets?
Starlink suggests a local hardware store for installation parts like grommets and bolts that its shop doesn’t carry.
What we checked this page against
- Residential order list data, no address · seen Nov 3, 2026
- V4 vs V5 dishes (support article) · seen Nov 3, 2026
- Standard 4 X setup guide (support article) · seen Nov 3, 2026
- Standard 4 setup guide (support article) · seen Nov 3, 2026
- Specifications page, Starlink V5 · seen Nov 3, 2026
- Third-party mounts (support article) · seen Nov 3, 2026
- Whether you need a mount (support article) · seen Nov 3, 2026
- Accessories overview (support article) · seen Nov 3, 2026
- Returning a mount or accessory (support article) · seen Nov 3, 2026
- Items missing from the shop (support article) · seen Nov 3, 2026
- Starlink shop, public accessory prices · seen Nov 3, 2026
- Standard accessories guide, PDF · seen Nov 3, 2026
- V5 setup guide (support article) · seen Nov 3, 2026
- Cable length and indoor routing (support article) · seen Nov 3, 2026
- US specifications, DOC-DF-1915-15313-48 · seen Nov 3, 2026
- Power supply placement and heat (support article) · seen Nov 3, 2026
- Standard 4 X setup guide, PDF · seen Nov 3, 2026
- Starlink installers (support article) · seen Nov 3, 2026
Each number on this page traces back to one of these entries; our fact rules explain how. If a reading has drifted, the corrections log shows how it gets fixed.